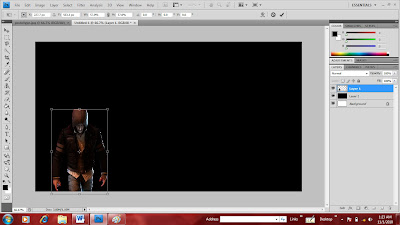
How To Use The Paint Bucket Tool & Resize The Picture:
You can continue with the picture you have cropped just now. To create a background color, use the mouse and click on the "Create a new layer" icon.
To color the background layer, drag the mouse to the Gradient Tool which is below the Eraser Tool. Then, press right click and select the Paint Bucket Tool.
After clicking the paint Bucket Tool, click it on the background. It will turn out into black color because it is the default color. You can even choose different color by clicking on the color box icon which is below the Zoom Tool.
You might be wondering where is the picture which you have cropped just now. Don't worry. It never disappear. The cropped picture is and the back of the background layer. You must drag the picture to the front. The cropped picture must be on top of the background layer. To do so, you must click the layer background (Layer 2) which u created just now and drag in to the bottom of the layer picture (Layer 1).
After dragging the layers, you can resize the cropped picture.
To resize the cropped picture, press "Ctrl + T". Then, press "Shift" and hold it while you were suing the mouse to resize the picture. The purpose of using "Shift" while resize the picture is so that the picture will not be different except the size (the picture will not be disturbed). This is the way of how to use the Paint Bucket Tool & resize the picture.


No comments:
Post a Comment